Quantcast
Channel: Skill Level 0
Viewing all 109 articles
Browse latest View live

Puttering about with the ACW models

$
0
0
I've been puttering with the 1/600 ACW ship models. Did some detailing on Union Casco class "torpedo boats" as well as work on some other models. Below are a few pictures of what's going on on the workbench. It's mostly slow work.

The big accomplishment was getting the primer coat on a couple of models. I'd had trouble getting Gesso to adhere to some of the the resin that Bay Area Yards used. I gave the models a couple of baths in warm soapy water and even tried CRC contact cleaner (don't try this at home kids!) to cut through the mold release agent.

Fortunately, with the recent spell of warm, dry weather, I could go to the old reliable method of using $1.50 a can gray spray paint from Wally World as a primer coat. I had no trouble getting the primer coat to stick to the models. 

Bay Area Yards CSS Texas with a primer coat applied.


CSS Texas is a new model in the Bay Area Yards lineup. The model seems to crouch on the table with the severely sloped casemate. I've got the model based and should be able to get this finished quickly.

Bay Area Yards timberclad USS Lexington.


I had a little trouble with the stacks on the Lexington. Sometimes, I'm my own worst enemy. One of the stacks was out of true, so I tried to bend it...and snapped it off right at deck level. I was able to reattach it, but the stacks are a bit out of true and look a little goofy. We'll see how it looks later with a coat of paint.


The timberclad in front of the Thoroughbred Figures model of USS Tyler.


I do like the variety in models we can access these days. Way, way back in the past, we were lucky to have one model of a timberclad from Peter Pig...now you can get detailed models of the Tyler, Lexington and Conestoga from multiple manufacturers.

Union Ellet ram Lioness from Bay Area Yards

Last up - an Ellet Ram. Ever since reading Chester Hearn's book on the Ellet Brigade, I've been hooked on the whole concept of the rams on the Mississippi River. Fortunately, I was able to add the sternwheel ram Lioness to my collection before it dropped out of production. I like Lioness because this is a rare model of a sternwheeler and makes a great addition to your model fleets of sidewheel rams from Thoroughbred and Peter Pig. I'm not quite done with this model. It needs another top coat, then some weathering and finally a little touch up on the base. Should be able to join the fleet by November!


1/600 ACW ship models from Shapeways.

$
0
0
I recently stumbled across a designer on Shapeways that made 3D models of ACW ships available. Shapeways, for those that do not know is a 3D printing company. Their printers can lay down a model one layer at a time. The finished product is a one piece model with no (or is some cases a little) assembly required.

Brown Water Navy Miniatures produces several models in 1/600. I ordered two of them - USS Monitor and CSS Baltic. I've been using 1/144 model planes from Shapeways for the past year, but this was the first time I'd found ACW ship models.

The models are durable. If you are familiar with the "White Strong and Flexible" material used by Shapeways, you know that it's a porous, tough material. It's a staple for the 1/144 airplanes and is a great material for table top miniatures - light and tough. The downside is that it's porous. To get a smooth surface for painting, you need to do a bit of prep work filling and smoothing the surface. But hey - it's a relatively cheap model ($6.00 for USS Monitor).

The USS Monitor is well sculpted with easily recognizable details. I've built several 1/600 kits of the Monitor, as a result, I feel comfortable reviewing this model.  Let's start with the basics, for a 1/600 model, it's a little on the small side. Checking Silverstone's Civil War Navies, we find the Monitor should have a length of 179 feet and a width of 41.5 feet. In 1/600, we're looking for 3.58" long by 0.83" wide. The model is 3" by 0.77" which by my numbers is 84% long and 93% skinny compared to the expected result. So...it's a little small.


The model sports a mix of features that don't cleanly mesh. The pilot house is the post-Hampton Roads refit with the improved angled armor.


But the smokestacks are clearly the pre-Hampton Roads square boxes designed to be removed before action. Post-Hampton Roads these two exhausts are routed into a common funnel.


Here we are side by side with a Peter Pig monitor casting. The SWF 3D model does not have the same level of detail as the pewter cast Peter Pig model. The anchor well and forward hatch are missing, but the rear ventilators and aft hatch are present on the Shapeways model.


Okay...this is just a bad picture. (my bad.) You can see the armored ledge around the top of the turret and sort of see the sloped armor of the pilot house.


CSS Baltic has similar issues at 83% of expected length, but 101% of width.


Bow view of Brown Water Navies CSS Baltic.

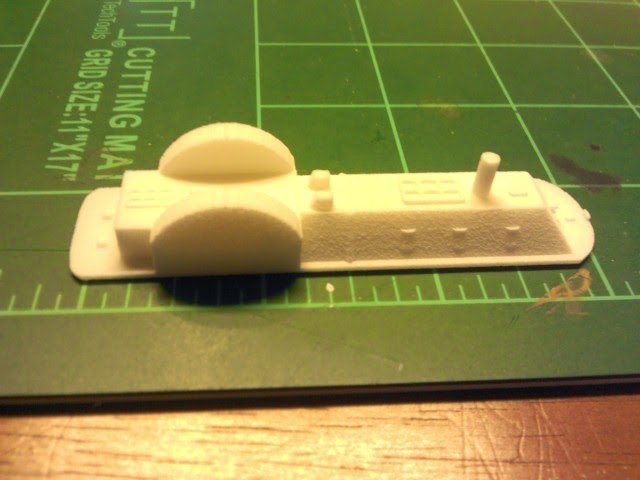
CSS Baltic. This view shows off the 'grainy' surface of the WSF material. With a bit of work and a top seal coat, you can get a smooth finish. You don't get the surface detail  or Thoroughbred or BAY, but it's recognizable as CSS Baltic.

The wheelhouses are inline with the hull. Since there is no photographic evidence to the contrary...okay. It's similar to many of the Peter Pig models. It lacks the detail parts you'd get with Thoroughbred.


Not bad models, definitely game table pieces...but tough, durable game table pieces. If I was running a game for kids - this is the way to go. They'd be hard pressed to break anything. But if you are closer to the scale modeling end, you'll want to stick to the Bay Area Yards and Thoroughbred Miniatures stuff. 

I'll likely order some more models from Brown Water Navy Miniatures in the future. There are some interesting odds and ends that look like they scale out closer to true 1/600. Keep your eye on this guy - Brown Water Navy Miniatures and Shapeways could become another player in the 1/600 ACW space. 
resin that is really tough. It takes a bit of prep work, but it pays off in the painting.

Progress on the WWI front...with Floatplanes!

$
0
0
Our recent group mega-order from Shapeways arrived and with it the fun. I've got a lot of work lined up for the winter. For a quick start, I primed two models that were ready for priming. These are two German Imperial Naval Air Service planes - the W12 two seat fighter and the W29 late war two seat monoplane.

The W12 is in the foreground with the W29 behind.

These models are printed in the Fine Ultra Detail (FUD) material. It's basically a smooth plastic resin that provides great details. The only downside is that it's not as durable (i.e. game table friendly) as the White Strong Flexible (WSF) in which I get most of my models printed.

 
You can see the detail on the wing ribs, the engine exhaust and struts. 


The model has the Wings of Glory flight peg cast to the bottom of the model - that's a plus.

The W12 next to it's predecessor the KDW.  North Seas gaming anyone?


Wonderful detailed model. The only assembly required was to attach the propeller.


The Shape(ways) of things to come: Infernal Machines ironclads from Black Army Productions

$
0
0
At the end of April 2015, Black Army Productions BAP unveiled their new line of 1:600 miniatures of warships of the American Civil War.  Those that know me and/or read  this blog know that I am a sucker for 1:600 warships - especially when the subjects are obscure models rarely produced by anyone else!

BAP has selected to produce this range using Shapeways 3D printing on demand services. You want one, you order it. Shapeways prints the design and ships it to you. No muss, no fuss. 3D printing is rapidly becoming the "shape of things to come" for miniatures production. The technology is rapidly advancing both in printer resolution and printing materials. This medium works well for certain aspects of the hobby. I'd ordered two 1/600 models last year from a different designer on Shapeways and was less than impressed with the'stuccoclad' and USS Monitor.  

But as I say, this technology keeps rolling along. I perused the list of products available on the Infernal Machines storefront. The investment was not too steep, so I placed an order for two unique models not otherwise available - The Yazoo Monster and CSS Barataria. I took the BAP team's recommendation to order both models in Black, Strong and Flexible as they suggest it has a smoother texture than the standard White Smooth and Flexible (cost an addition $1.00 per model) The models arrived after several weeks - unusually slow for Shapeways, but it might speak to the demand for the BSF material and print runs. Regardless, it's not something BAP can control - the delay was all Shapeways.

So the models arrived on my doorstep. Opening the box, I found my two models. The Yazoo Monster lives up to it's name - It's a beast! One of the great things about 3D printing is that the model is a single piece. Hull, casemate, paddle wheels and stacks all one single piece. No assembly required! Try doing that with the conventional casting methods and see what happens!  Size wise, we are talking about a model in the same size range as CSS Nashville. It's similar construction as well, with a number of key differences. For instance - three smokestacks!

The Yazoo Monster (the black blob) lined with with Thoroughbred's USS Choctaw and Bay Area Yards USS Dunderberg gives you a good comparison of the relative size of the models.

Here The YM is in the middle with Dunderberg and the BAY CSS Missisippi model. 


The model is surprisingly smooth when printed in Black Strong and Flexible. It's a far superior medium than White Strong and Flexible and worth the extra dollar. Any of you that have worked with WSF and gaming models will appreciate the improvement that BSF offers.

This close up shows some of the surface detail (or lack thereof). My biggest worry was it would be a 'stuccoclad'. That turns out not to be the case - this should paint up nicely!

Bow aspect of the model. The forward gun ports are modeled, but lack any sign of the gun barrel or a shutter. Given the limited details available, I'm fine with the depiction on the model.

Okay - so this thing is tough to photograph in black!  Mea culpa!  But you get a sense of the size.


Now for the sticklers out there, the detail. I'd place this model on the continuum of being between Bay Area Yards and Peter Pig for detail and quality. The model has decent game table details - pilot house windows and gun ports are cleanly modeled. The deck and armor do not reflect the engraved detail you get from Thoroughbred or Bay Area Yards. But you know what? That's okay. This model should paint up very nicely.

The second model is CSS Barataria. This is another obscure ship that is not available in 1/600. It's so obscure that little information is readily available regarding this ship. It apparently carried some form of armor over the boilers and mounted a gun. A stern wheeler, she was captured by the US Navy and served as a Union ship for the remainder of the war.

CSS Barataria

A one piece model, the stacks are a little fragile, but the wheel was already assembled!

The model has a very narrow beam. It's comparable to the beam on a Thoroughbred blockade runner model.  The wheel looks like it would be better suited on a mill pond than a river boat. The model is small - about the size of a Thoroughbred tug boat  or the BAY Naugatuck models.For a model this small, it's maybe a tiny bit pricey, but you are getting a unique model available from now one else.

Bigger than a tug, but smaller than USS Fuschia from Peter Pig.

Here is Barataria next to a Thoroughbred blockade runner for comparison.
My verdict: Good solid gaming pieces! I'm happy to use both on my gaming table with the rest of the collection. The detail is not at the high end work done by Thoroughbred or Bay Area Yards, but I'd class it as a "show" in the classic "Win-Place-Show" ranking of a horse race. I'll be keeping my eyes on these guys in the future! 

1/144 German float planes - ready for action!

$
0
0
I'm almost done painting the plethora of float plane models for gaming with the Imperial German Navy Air Service. (Two holdouts which should be done in a week or two.)

Here is one of the Shapeways W12 models. This one (and the W29) were designed by colinwe.
The W 12 was painted a primer gray and then brush painted with Vallejo Sky Gray. The fun part was the three color naval camo pattern. No, I did not paint the camo patterrn. This is a decal produced by 1/144 Direct. This is an  excellent product. Easy to cut, easy to work with, adheres well.  

The model with the camo applied, but before adding the national insignia.

It takes a bit of time to cut the various pieces to fit, but it does pay off in the end.


Painting the W29 was esentially the same process, but with one fewer wing to worry about. The missing wing was more than made up for by the complex underwing struts. 

 The W.29 finish is a mix of the 1/144 Direct 3 color naval camo and the Reviresco W29 decal side panel with cross and number.

 Another plane on the table is the 1/144th Friedrichshafen FF49 two seater floatplane. I have two models - one got the three color naval lozenge pattern while the other got a very different two color camo pattern. While late-war, the pattern almost feels like something you would see 20-25 years later. These models took a bit more preperation as they were printed in White Strong and Flexible material. After an intial coat of PVA glue to fill sub surface pores, the application of multiple coats of clear acryllic gloss coat created a smooth surface the the paint and decals would work with.

In preparing the model two struts broke. They were replaced with brass rod.

 The FF49 was a 'large' biplane as cab seen in the below image where it is paired with a W12 (also not a small plane).


The FF49 on the left. Colors are sky gray and reflective green with cork brown floats.

The FF49 done up in three color naval lozenge camouflage. National markings are from 1/144 Direct.
Now the models are done, we're ready for some North Sea patrol engagements. The next images showcase the collection.

Three color lozenge rules! From front to back its -  FF49, W29, and a pair of W12. Bring on the Felixstowe!


The rest of the squadron, not as uniform in appearance. A pair of Brandenburg KDW with an AGO CII in front and a W12 making an appearance in the back.

The two FF 49 models showing the different paint schemes with the AGO CII in light blue and the KDW in the back.


A Pastiche of Pushers

$
0
0


Recently, we’ve been playing more early war. While it’s been fun using the earlier fighters, I’ve grown weary of the same match ups of Eindeckers, Moraines and DH.2 from the available models. There were a number of early and mid-war planes used by the Allies that Wings of Glory does not yet support that I’d like to see on the table. I won’t get into a discussion of why that’s the case other than to say as an old school gamer, I’m in the camp of right rules for it and let me worry about finding a model.
In my last order with Shapeways, I chose to expand our gaming options by through the acquisition of several pusher planes. Though ultimately an unsuccessful design path, pushers served extensively during the war, in some theaters right up to the end. 

For the early war period, I selected the Vickers FB-5 ‘Gunbus’. Without a synchronizer, the Gunbus used the pusher design to give the gunner a wide field of fire to the front. Vulnerable to fire from the rear, slow and with poor maneuverability, the FB-5  was withdrawn from combat in 1916 when the Germans began fielding Halberstadt’s and Albatross biplane fighters.

The FB 5 on the left in the middle of the painting process.


Almost finished! Roundels from Dom's Decals. Number decals from Woodland Scenics.


The model has a magnetic ball bearing attached to the bottom which allows it to pivot on the top of the stand.


Here the plane is pitched up in a climb. The ball bearing is clearly visible on the bottom.


...And pushed over into a dive.This is about the limit of the pitch down. The support peg is hitting the landing gear struts. Decals on the tail are salvaged from an old Avro CF-105 model kit.


The stop gap solution to the new German fighters was another British pusher design – the Royal Aircraft Factory FE.2c. Similar to the FB-5 with a two man crew and pusher layout, the FE.2c was a larger aircraft that mounted an additional machinegun mounted on a pedestal giving the gunner the ability to shoot to the rear of the aircraft. To use the rear gun, the gunner would stand in/on the cockpit and shoot to the rear – seeing in done on the ground was one thing, but imagine doing this in air combat with the plane pitching about and you with no parachute! 

The Shapeways FE.2c in the final stages of decaling.


All based up and ready for gaming. Unlike the FB 5 this model has a flat magnet on the base which does not allow the model to be pitched about it's axis. Decal's are also from Dom's Decals and Woodland Scenics.  You can see a bit of graininess to the upper surface of the right lower wing. This is an effect of the White Strong and Flexible material. It's a bit exaggerated in this close up. At normal gaming distances, you don't notice it.

Rear quarter view of the FE.2c. The base is from Litko Game Accessories  


Rear view of the model on it's base. The playing mat is from the Nexus Wings of Glory product line.


Front port quarter view. The crew were printed in the cockpit as was the forward gun. The rear MG is not modeled. Decals from Dom's Decals and Woodland Scenics.
 The FE.2c served through Spring of 1917 being the main victim of the German fighters during “Bloody April”. They were soon superseded by the Sopwith Pup and Camel and relegated to Home Defense and training squadrons.


Last up and really more of a late war plane is the Savoia-Pomelio SP 3. A pusher design that was an Italian evolution of the French Farman pusher, the SP 3 retains  many of the features seen in the prior examples above. A two seat biplane pusher armed with a machinegun (or more rarely a 20mm cannon) the SP 3 was used extensively for reconnaissance and artillery observation well into 1918.

The SP-3 nears the end of painting. The tricolors on the vertical stabilizers had to be hand painted. I can't paint a straight line to save my life. You make do with what you have. The gunner and the MG were 'printed' as part of the model.


With most of the decals applied. Dom's Decals was the source of the roundels. The nice thing about Italian planes is they use half as many roundels as other countries because the bottom of the lower wing has the national colors painted across the entire surface. I'll look for a picture of it...


Quarterview showing off the struts of the tail booms.
 
 Like most other pushers it was slow with poor maneuverability, especially compared to the much more modern designs in use by 1918. In a perfect world, it would have been retired and replaced with Pomelio PD and PE two seater biplanes, but the disastrous retreat of the Twelfth Battle of the Isonzo (Better known as Caporetto) resulted in the loss of massive numbers of Italian aircraft. While the Italian RFC regrouped and re-equipped with the more modern designs, the SP3 was retained in service. It was not until summer of 1918 that the SP3 was replaced. 


It's 1918 and the SP3 has been caught out by this Phonix C.II (Another model from Shapesways to be covered in a future post)


The Phonix C.II gains position to the rear, unless the Haroit HD-1's join the fight, the SP3 is in serious trouble.  The C.II is on a base from the Aerodrome, while the SP3 is on a base from Litko Game Accessories.
 
These were all easy models to produce. The great thing about 3D printing is not having to fuss with assembling struts and booms – the whole model is assembled and ready for painting. All three were printed using White Strong and Flexible (WSF) material.
For painting, I’ve come to believe that the most important step is surface preparation. The porous, gritty nature of the WSF material can be corrected. I use diluted PVA glue for the first soaking to file the subsurface, but following that I used multiple light coats of gloss clear coat. 
 

It can take many repeated coats, but the results pay off in a smooth surface that takes primer and paint very well. 

The planes were painted with a mix of acrylic craft paints (Americana, Alene’s, etc.) and Vallejo paints. Camel was used for the wings on the FB5 and FE2. Vallejo Buff was used on the SP3 wings. Sky Gray is a great match for much of the gray skins and struts. Brown Violet is the stand in for the PC10 Olive Drab color and flat brown/cork brown.

Queen of the North Sea sky

$
0
0


We often think of the air war in the Great War as one between dueling individuals. “Knights of the Air” atop their aerial steeds sparring in combat over the muddy trenches. It was the origin of the fighter pilot mythology – one man risking it all in battle with a gallant. As with many things the reality was much more complicated. The air war over the trenches was fought for specific aims – air photo reconnaissance, artillery observation and bombing. 

But a second, less glamorous air war existed. One that was as important – if not more important – to the ultimate outcome of the war. That was the air war at sea.  While naval aviation had no direct effect in the rare battles between the fleets, aviation was critical in the areas of naval patrol and interdiction. Airships and aircraft of both sides patrolled the North Sea on the hunt for u-boats, enemy aircraft – including airships, light coastal craft, warships and mine layers. In a defensive role, they escorted their own forces through dangerous waters. 

By late 1916 The Felixstowe flying boatswere the premier patrol aircraft in the North Sea. Possessing great range, a good bomb load and impressive armament for the day, these aircraft were the Queens of the North Sea sky. 

Overhead view - roundels from Dom's Decals.


Felixstowe F2 early model ready for action. The red lines on the base denote various firing arcs.


Wings of War included the Felixstowe F2 (And Curtiss H-12) in the expansion game “Flight of the Giants”. You thought the Caproni and Gotha were big – think again! The Felixstowe is huge with a broadside of machineguns enough to make any German pilot think twice about engaging in combat. So much so, that the Germans would throw flights of W12 and W29 at a Felixstowe to even the odds a bit.  
Several nice models of the Felixstowe can be had from Shapeways from either Decapodor Colinwe. I ordered mine in the standard White, Strong and Flexible material. The model is an impressive piece of resin. The wingspan actually exceeds the length of the range ruler for the Wings of Glory game.
I didn’t model a specific historical paint scheme for this aircraft. Many of the planes were painted in a dazzle paint scheme. It was not as much camouflage as it was a colorful easily identifiable pattern to help identify a plane. Unfortunately this is something that is beyond my skill set to paint. 

Good port quarter shot of the model.


I went with a fairly bland combination of PC 10 for the fuselage and camel for the wings. It’s a fairly conventional scheme. To make it somewhat unique, I used decals from a variety of sources to put identification marks and symbols on the aircraft hull. 

The flag was scavenged from a set of decals for an Avro CF-105 kit.


Good shot of the magnets joining the model to the flight peg. The grain of the White Strong and Flexible surface is visible here, but when back up to normal game viewing distances the grain fades from view.


A strong rare earth magnet was attached to the bottom of the hull and paired with a magnet on the flight peg. This ensures the plane is not likely to tip over or fall off it’s stand. The magnets came from K&J Magnetics

The base ships without color. I had to paint all the lines and text. This is easy - the lines are laser cut and a paper backing protects the surface of the base while you paint. In hindsight - white is a better color choice for the altitude numbers on the acrylic base. The black numbers fade into the playing mat when not on the straw colored field,


The custom base is a product of the Aerodrome store


I know - I can't paint a straight line. 

Now to get this beast onto a table for a game!

Rising from the ashes…the Phönix C.I

$
0
0
All three models in line abreast. The game mat is the coastal mat from Nexus games.
In early 1918 the Austro-Hungarian Air Force - the K.u.K. Luftfahrtruppe -  deployed a new two seat biplane – the Phönix C.I. Deployed to the Flik/D and Flik/K squadrons, the Phönix C.I was used in the reconnaissance and general-purpose (i.e. light bombing and escort duty) roles supporting their respective division or Army corps. 

With a production run of 110 aircraft, the C.I was never a dominant part of the K.u.K. Luftfahrtruppe, being just 4% of the aircraft produced in 1918. It’s unique rudder and stabilizer structure gave the C.I an excellent field of fire to the rear (much like the Hansa-Brandenburg W.12 or W.29). 


The C.1’s were pressed into the air defense role as the imbalance in production rates saw the weight of numbers shifting in favor of the Italians. The Italian 1918 air offensive put the K.u.K. Luftfahrtruppe mostly on the defensive, though limited tactical bombing and the occasional strategic mission still occurred.
 
One of the models done up in the gray and green colors that research indicates is more prototypical.

 
This C.I has the Italian right where he wants him.

These models are from the Shapeways shop of colinwe.  The listing for the Phonix C.I has several options for materials. All three of the models were done in White, Strong and Flexible. WSF does require a bit of prep work to get a good painting surface. As an aside - I recommend the Black Strong and Flexible as it’s an easier surface to prep (it still needs some work).  Yes, it costs slightly more, but the result is worth the investment.

Overhead shot of all three models.

Painting of the models were a case of a variation on a theme. Working from a Jack Herris plate, the first plane ended up with a brown and green pattern more reminiscent of the WWII Luftwaffe. Next was the same type of pattern but using colors the text indicates were more prototypical based on research of a museum aircraft. Lastly was a lighter palette choice that more closely matches the Herris artwork.
Decals help enhance these models. The national markings are a mix of I-94 and 1/144 Direct. The white stripe is from a set of S Gauge boxcar decals.

The C.I's in a loose V formation. The squadron leader has the classic Austro-Hugarian red-white=red stripes on the tail.

The one area that Shapeways designers are still working on is including crew figures for the planes. While the basic airframe is very nice, adding crew helps bring the plane ‘alive’. For these planes, I used crew figures from Riveresco. The pilots are mostly lost to view, but the gunners are very much on display. 

A Flik/D en route to bomb an Italian bridgehead. Prop discs and bases are from the Aerodrome store.


Shapeways 1/144 BE.2C models are finished!

$
0
0
The last of my early war add on's were the BE.2C models. Done up in early war Western Front colors, the BE.2's will serve as targets and objectives as they attempt to perform recon and spot targets for the artillery. At first not equipped with a weapon, armament advanced to carrying a Lee-Enfield rifle for the observer and eventually evolved to a single machinegun covering the aircraft's rear. Mind you, the observer seated in the front seat was firing this gun backwards, past the pilot.

The BE.2 had a long service career and like so many other planes served well past it's expiration date. The crews suffered heavy losses against the more efficient Albatross and Halberstadt fighters.

Prop discs are from the Aerodrome store. I like how the discs really make the model pop as opposed to the static prop.

The planes were printed in White Strong and Flexible. I did the typical base coats of PVC glue followed by layers of clear gloss. In this case, the prints were very rough and required heavy amounts of sanding. The unpainted surface had what looked like a wood grain texture due to the printing process. It's not the end of the world and it can be restored, but it takes a LOT of work. I almost complained to Shapeways, but in the end, the models are still serviceable gaming pieces. 

The bases are from Litko. Rare earth magnets connect the model to the flight stand post.


Decales are from Dom's Decals and Woodland Scenics (for the numbers.)


Hobby craft paint was used for the yellow. This particular color is Lemonade.


I went a little overboard on the exhaust stains on the upper wing surface. Guess this crate has a chronic oil leak!


The oil stain is very evident in this image.


Hoist the anchor and raise steam! ACW naval floats back to the surface.

$
0
0
After an entirely too long hiatus, I'm refocusing on my 1/600 ironclad and wooden ship collection. 2016 is going to be the year that I eliminate the back log at the shipyard and get these ships ready for the tabletop. There will be some sorting and prioritizing, but for now, there is some low hanging fruit that can be easily pushed to completion.

CSS Texas was an excellent ironclad design that saw service with the Confederate James River squadron in the later part of the Civil War. Bottled up behind obstacles and torpedoes, Texas never really had the opportunity to engage the Union Navy in a full blown naval battle. Instead, Texas contributed to the 'fleet in being' that tied down a significant number of Union warships for the last years of the war.

CSS Texas from Bay Area Yards


Beam shot showing the low profile of the casting.  Thoroughbred City class in rear for comparison.


Overhead shot sowing the detail of guns, ports, deck around and bollards.


Aside from knocking out the CSS Texas model, there were a number of fortification and building models languishing in the queue. Battery Buchanan is a ubiquitous fortification from Fort Fischer, North Carolina. The remainder are somewhat more generic pieces that can be used for most any game.


Battery Buchanan (rear), two warehouses and assorted batteries, all from Bay Area Yards.


 3-gun Earth Battery from Bay Area Yards in the back. 3 gun battery from Titan(?) in front.


I have several three gun battery models that are great for modelling the 'hasty' earthwork batteries that are thrown up repeatedly during our campaign games. Basically piles of dirt with whatever guns could be scraped together, these models get a lot of use on the gaming table.


Two brick lined batteries and warehouse models. CSS Mississippi in the rear. All models from Bay Area Yards.


Beast of the Yazoo River

$
0
0

A recent acquisition from Shapeways shop Infernal Machineswas a 1/600 model of the unnamed Confederate ironclad known as the “Yazoo Monster”.  This ship, laid down at Yazoo City, Mississippi was never completed. But in the rich tradition of Confederate naval projects that never quite made it into action, this is a worthy addition to my collection.   
To paraphrase Nelson Muntz, from The Simpsons ‘historical records from this period are spotty, at best’.  However, so very good naval design archeology is attempting to reconstruct what had been hidden. There’s a nice discussion on the Yazoo Monster over on Civil War Talk. There’s even a set of conjectural plans showing how the ship might have appeared.  Some of these plans served as the inspiration for the model from Infernal Machines.
As covered earlier in this blog, I had purchased a model of this ship earlier in 2015. Since then, it has been languishing in a box awaiting some paint. With the conclusion of my 1/144 biplane project, I’m moving back to ACW naval models. The Yazoo Monster was an easy project to get reengaged with the period.
The model was delivered from Shapeways as a single, ready to paint casting. I’d ordered it in Strong, Black and Flexible. Yes, it cost a dollar or two more, but the improvement in the smoothness of the surface pays for itself in time saved from preparing the surface.  I used a few coats of my Krylon gloss coat spray sealer and a little bit of light sanding with a 120 grit sanding stick (This plastic stuff is tough!) and I was ready to paint.
For painting, I endeavored to follow the teachings of award winning miniatures painter Bill Moreno (aka TMP member ACWBill) as conveyed in his painting guides to ACW naval miniatures. Bill’s guides are concise, clearly laid out guides to getting your models painted and on the table with the least amount of fuss.
First step was to prime the model using Krylon camouflage spray paint. 

After the base coat of paint has been applied.


Overhead view of the primed model.


You can still see a bit of the surface roughness inherent with using the Black Strong and Flexible printing material.
After allowing this to dry, I painted the hull with a coat of Vallejo black. The hull of river vessels get a heavy coat of tar and tend to be damp – I like the look of the darker hulls. 

Next step – paint the casemate. Since the consensus of color for the CSS Arkansas was a chocolate brown color, I endeavored to create a similar color for the Monster. Using a medium brush I applied a coat of Vallejo cork brown.  After that dried, it was back to the Vallejo black and painting all three funnels and the open gun ports.

Lastly was painting the deck, both forward and aft. The camo spray color was not bad, but I wanted something a little lighter. The solution was a coat of Vallejo buff paint.

Painted and almost done!


Once the base coats had dried it was time for the highlights and dry brushing. I used a variety of Vallejo gray paint including Sky Grey and Basalt Grey to high light the edges of the casemate and hull. The sky grey was dry brushed over the model to tone down the cork brown and lighten the black hull. 


The Yazoo Monster and the Pook turtle side by side. This really drives home the size of the Monster and gives you idea how it earned it's name.

The Yazoo Monster with a Pook Turtle from Throughbred Models in the rear. This is a reasonable comparison of what the Monster would have faced on the Mississippi River (though the phase bigger and more comes to mind).

Here's the Monster next to a model of USS Minnesota from Bay Area Yards that is currently stuck in the assembly queue..
 Once dry, the model was hit with a coat of gloss coat to protect the paint job and a coat of matte finish to remove the glass sheen. Now it’s ready for the tabletop!


Assembling the Bay Area Yard's CSS Selma kit

$
0
0
My ACW naval collection addiction knows no bounds. So when Bay Area Yards added a model of CSS Selma to their product line I quickly purchased a copy. And that's where 'quickly' died. I think the hogging means intimidated me from tackling assemble.  Selma went into the backlog queue and garnered no attention.

Until now.


I pulled the kit out this week with the goal of assembling the model. The first step was a quick wash in hot, soapy water to remove any lingering mold release agent. After a year spent 'aging' on the shelf, the model appears to have cleaned up nicely after it's bath.


Second was trimming and sanding. The bottom of the hull had a little bit of flash. Nothing unusual when working with resin kits. The hobby knife and a file made short work of the flash. More troublesome were some bubbles of resin under the deck overhang. Using a # 58 drill bit on my Dremel (tm) tool, I was able to remove the resin bubble residue. This was being really picky as once the model is based, no one will see the work I put in under the decking.

Okay - let's get this party started! The hull in a nice single piece that contains the superstructure and wheelhouses. There is an identation for the hole that accepts the pin in the stack, but you need to bore it out. Again using the #58 drill bit in the  Dremel, I bored out the hole. The mast pin slid in easily. Using a little CA glue, I glued the stack in position, carefully lining up the secondary exhaust stack in line with the long axis of the ship.


The pilot house is a little rectangle. This is glued atop the superstructure on the forward edge facing the bow.

There is a skylight that is added to t he superstructure aft of the smokestack. A little CA glue will hold this part in place.


Overhead view showing the instaslled pilot house, stack and skylight over the cabin.


Next up is the hard part - the hog frames. These timber beams served as 'hog chains' designed to prevent the bow and stern from sagging or rising. The frames give Selma a distinctive look. Each frame needed light sanding to clean up the pieces and sharpen some edges. This was a delicate task and the hog frames are delicate pieces of resin.

The hog frames. You can see some rough spots in this close up that required a little sanding and filing.


Installation was done by applying a CA to the back of the frame facing the wheelhouse and the to the bottom of the four contacts with the deck. There is a little bit of guesstimation in where ti align the frames. I tried to center them best I could without blocking the view from the pilot house. Once one frame is installed, repeat the process on the other side.

The assembled model sans ordnance.

Overhead view of the bow end...

...and the stern end


At this point assembly is done. Next up will be painting the model and the guns.

ACW Naval 2016 Week 1 status report

$
0
0
A short update of what I've accomplished this week. It feels like slow going, but much of the challenge is tied to the holidays and the marginal weather we've had. I've been focused on assembly and priming to move some of these projects forward.  To help stay motivated, I want to do at least a weekly post this year showing the progress and process of getting the ACW ship models ready for the game table.


CSS Selma after a coat of primer.


CSS Selma acquired her first coat of primer. This is a model from Bay Area Yards. Given that I missed a spot she may require a second coat to hit those hard to reach places.

CSS Selma - the pronounced overhang of the deck made getting the spray paint onto the hull a challenge. This will likely need a second coat of primer before painting begins.
 
 The real progress was in the assembly of  the CSS Patrick Henry and her near sister CSS Thomas Jefferson (Yorktown). Both models are from Bay Area Yards.These two gunboats saw service with the Confederate James River squadron. Both participated in the Battle of Hampton Roads, and Patrick Henry served to the end of the war.

Patrick Henry and Thomas Jefferson. Or is that vice versa?


These two kits have been awaiting assembly for a number of years now. There are impressive number of parts. This is one reason why the models have been sitting so long. I just didn't want to tackle all the fiddly bits. But that's over. Using JB Weld, the paddlewheel houses, superstructure and masts have been attached.


Port broadside


Patrick Henry and Selma together.


I'm glad I assembled these models - they really make for a pair of pretty ships. Now to get them painted and rigged so they can be used on the tabletop!

ACW Naval Week Two status report

$
0
0
It's been a busy week! Even so, progress has been made on the ACW Naval front.

I'm moving along with assembling the USS Pawnee model. This weeks task was to build the masts and get them painted. As you can see - not quite done with painting, but on the way. I want to see how dark the gray paint dries. This may need a lighter shade.


The mast kit from Bay Area Yards. You get a nice selection of spars and sails from which to choose.

The hull of USS Pawnee. I was originally going with a black hull, but the references seem to skew towards overall gray.

Work on the Patrick Henry and the Thomas Jefferson continue. Assembly is complete, so now its time to paint. Using Vallejo Basalt Gray for the hull. I wanted dark gray, but not black for these models. Deck is painted buff and upper wheelhouse in white.


CSS Patrick Henry model by Bay Area Yards.


Another project in the early stages is the Bay Area Yards model of USS Powhatan. This one is on the early stages of assembly. I have the masts, just need to assemble them. I'll to check to gun park to see if there are enough deck guns in stock to complete the model. These big ships eat up a lot of guns and my stockpile of Thoroughbred deck guns is dwindling rapidly.

USS Powhatan hull from Bay Area Yards. You can see the rings for the bow and stern pivots cast to the deck.


ACW Naval Week three status report

$
0
0
Good progress was made this week!

The CSS Selma model from Bay Area Yards is cruising to completion awaiting a bit of touch up to the paint and the completion of the painting of the 'water' effect on the base. The - of course - the four cannon have to be glued to the deck. A protective gloss/flat coat finish is preferred, but the wintry weather make that unlikely. (Though to be honest, this winter's weather is all over the place thanks to "El Nino".)

Here's CSS Selma out for a shakedown cruise


Port bow quarter view.


Ship is painted in Vallejo paints. Basalt Gray on the hull, stack and hogging beams. Light gray on the deck and superstructure fore and aft faces. Moss green over the tan primer for the 'sea' effect (still a work in process).


What's wrong? Never seen the hand of God before? Okay, I admit it. I don't know what happened here.


CSS Patrick Henry getting closer to completion. Her sister model CSS Thomas Jefferson is in about the same state.

The USS Minnesota from Bay Area Yards. Still a lot of work to do here before it's ready for the table.

 Many years ago, I bought a Thoroughbred Models kit of USS Sassascus for the purpose of turning it to parts for other shipbuilding projects.  I'm working on finishing the ship using a variety of parts includes styrene and masts from Bay Area Yards. The kit is close to completion. Adding the guns and the standing rigging is about all that is left. I've painted the model in the late war overall gray scheme used in near shore waters while on blockade duty.

The masts are from Bay Area Yards. The other bits are Thoroughbred.


USS Powhatan in the foreground. In the early stages with this one. Lots of work to complete.

The figures lurking in the background are from the Atomic Cafe line. President for life Nixon and his Secret Service bodyguards, Got a couple of projects in mind for these figures. Arrrroooo!


ACW Naval Week four status report

$
0
0
Progress continues with the ACW naval project. The big news is that CSS Selma is finished. You may remember that work started on the Selma a few weeks back. Assembly went quickly and then moved into the painting phase. Happy to say that painting is done. A varnish top coat would be good, but that will have to wait fo the weather to improve.


Here's the Bay Area Yards CSS Selma next to the Peter Pig Selma. While somewhat similar, there are marked differences between the two models - and not just gun placement, which is my fault.

Overhead view of the two models. Length is similar, but the BAY model captures to deck overhang out the limit of the wheel house and has a longer superstructure.  The Hog chains are not included in the Peter Pig Selma. You could model them yourself if desired.


Another model nearing completion is the Thoroughbred Models Sassacus double-ender. This is a salvage job of a kit sacrificed for parts. Sporting a late war paint scheme of gray, the model is ready for the blockade.  About the only steps remaining are to clean up the masts and install the standing rigging. Oh...and the national colors!

Sassascus class with guns mounted.


Another model that's been languishing in the painting queue - USS Varuna. The model has needed new masts installed. I've had the masts for over a year, but - as with the other models - have not made any progress completing the model. But now the masts are installed. It should be a quick job to add deck guns and the standing rigging. Then Varuna will be ready to take to the table.


With the 'low hanging fruit' off the table, focus can now shift to completion of the CSS Patrick Henry and near sister CSS Thomas Jefferson. These nicely detailed models need a fair amount of painting to get all the details covered. Even so, the painting should wrap up in the next week, allowing for the guns to be mounted and the standing rigging to be added.

Progress on the Thomas Jefferson. Thought I'd try something different with the paddle wheels. It will help differentiate the model from the Patick Henry.

And the Patrick Henry

USS Pawnee is also moving up in the queue. The masts were mounted this week and the deck painting is done. On to mounting the guns and starting on the rigging.


Some ad hoc bracing was required to keep the mast in position while the glue set.


Pawnee in the background. The Thoroughbred Models USS Kearsarge in the foreground. Pawnee was a wide beam shallow draft vessel designed for inshore work.

USS Pawnee. This shot shows off the wide beam of the hull.


Last up - after a bit of experimentation, I've hit on a new color combination that captures the look of inshore coastal and some riverine waters. It's achieved by blending two colors and applying over a base coat of tan/light brown. The Folk Art Forest Moss really nails that watery green I'd see on the sounds of North Carolina.


Post script - This is the 100th post for this blog! Woo Hoo!

The Giants have landed! Unboxing the Staaken and Handley Page 0/400 heavy bombers

$
0
0
The long awaiting heavy bombers from Ares Games Kickstarter campaign have arrived! It was a longer than expected wait...but the goods arrived in today's post. How did they look? Pretty darn good!

Found this large box on the porch today. That's a lot of box for two models!

Opening the box up we find...campaign add on's from the Aerodrome - smoke and flame markers for the bombers and a 'standard' base as well as a deck of 'ace' ability cards.

These were offered as special upgrades with the campaign. If you've used them before, the smoke and flame markers are great visual upgrades to the standard markers.   

A close up of the smoke and flame markers and the ace ability decks. (Get to the bombers! )


What's this?  A Handley-Page?

Wow - that's some robust packaging!  Let's see what's inside.

It's a Handley-Page bomber model!


And a Staaken R.VI model

 
It's a poster showing all the Great War planes Ares makes. Will look great framed.

Opening up the Staaken box and there's a lot going on. The plane is well protected in it's cradle. The posts for the flgiht stand are in the top center and the maneuver and ace decks are in the upper right.

A close up of the ace abilities deck.


Remioving the plastic cover from the plane. The entire cradle for the plane lifts out...

...revealing the assorted paperwork.


There's assorted paperwork in the box. A Kickstarter certificate, Staaken specific rules, playing surface maps  and another poster!

The rule booklet includes the basics of multi-engine aircraft and the scenarios.

Reaching the bottom of the box, we find the plastic base and the data and management cards.

A close up.

Counter sheets, aircraft card and management cards.

The R.VI on it's flight base.

They did a nice job with these models. A little more detail on the crew would have been nice, but hey - it's a very nice model! Look at the detail on the engine nacelle.

I thought the Caproni had some odd gun placements.

The Handley-Page has the same components as the Staaken. It's a nicely rendered model.

The red and white nacelles give this model some color.

What's the deal with that nose gunner. Standing and waving?


And there you have it.
These are one half of the kickstarter models. Exercising restraint, I do not have the other two models to review. There's another H-P 0/400 with nice tactical markings done up in a night bombing paint scheme and a Staaken with a green lozenge pattern and late war iron crosses that looks quick fetching.

It took a bit of time to deliver, but Ares has delivered. If they contemplate doing similar campaigns for other aircraft (Felixstowe...cough cough), I'll definitely be jumping in.

ACW Naval Week Five Status Report

$
0
0
okay, it's been a busy, hectic week for a number of reasons, so this week's update is moe of a photo montage of what's been going on. Progress is being made, some models are nearing completion while a couple of new ones made it out of the box and onto the construction table. So without futher ado...

What's almost done...

The Yazoo Monster is done. Based up and ready for gaming. To be honest, I'm having doubts about the base coloration.


CSS Patrick Henry is almost done! Just need to work on the guns and get the rigging done. (groan...rigging.)


CSS Selma based up and just needing a flag to be finished.

Sassacus salvage project almost done. Just a little riggind and a flag and I'll call it done.


What's getting there...

CSS Florida from Bay Area Yards. This one's been sitting for years. It's stuck at the stage of needing it's rigging completed. So that's the task at hand. The foremast has most of the rigging installed. Then it's work aft to the end.

Close up of the rigging. I think the stacks need to be painted a darker color, but the raiders often went 'low visibility'.

Another model from the Bay Area Yards stable - USS Varuna. Got the masts installed and the formast has it's standing rigging in place.


What's new to the queue...

I pulled out the model for CSS McRae this week. A Confederate gunboat that fought at New Orleans,  it's model that has only been available from Bay Area Yards. It's been in the box for about 18 months since it came home with me from a trip to California.

Sorting out the parts, the masts got a bit bent in transit coming home.

The masts were pretty easy to straighten out.


It's a relatively small model compared to many other ships.
The hull with the bowsprit installed.
Overhead view of the hull.


Another new project to reach the table is USS Lackawanna. It's a near sister to USS Hartford (in the middle). The Bay Area Yards model has more of a fighting right for the masts.
Here's an overhead view of the Lackawanna hull. These screw sloops saw extensive service on both the coasts and the Mississippi River campaigns.


USS Kearsarge is in the process of being assembled. This is a Thoroughbred Figures model that's been in the box since - ahem - 2007. Assembly has gone well so far. The outstanding items are the chain armor boxes and the bedding rolls along the tops of the gunwales.


ACW Naval update week six

$
0
0
Another quick photo log update documenting activity on the blog. Lots of little tasks have been completed. This means a couple of items are 'done' with many more limping on towards completion. It is starting to feel like progress is being made. So, more coal for the boiler fire and keep on steamin' for the goal!

What's done!


The 6 gun earthen battery from Bay Area Yards is a great model of a water battery or other suitable fortification for your naval games. The battery floor and interior walls have a brick surface with capstone on top of the wall. I've equipped the model with models of 32 pounders on garrison carriages from Thoroughbred Figures.

Battery Buchanan is completed! This is a large four gun battery that was an element of Fort Fisher in North Carolina. The left hand guns looks out of position. Have to check on that...

To convey the size of this model, that's a Thoroughbred Figures USS Sassacus behind the battery model.


...and with the 6 gun battery immediately in front of it.


What's coming along...

Rigging continues on CSS Florida. Moved on to bracing the main mast. Hope to have that done this week and then finish the mizzen mast next week.
 
Closeup of the foremast. Just realized - I still need to paint the sails. So...a little moire work, but not too much. And really thinking about repainting those twin stacks a dark gray or black.
USS Varuna. The rigging is installed. Now to paint the riggning, tough up the rest of the paint job and install the guns.

Three new projects past the assembly stage  USS Lackawanna and CSS McRar and USS Kearsarge.

Another new model almost assembled - CSS/USS Calhoun from Bay Area Yards.

There are eight parts that make up the pictured model. Still need to add the walking beam and guns.

USS Lackawanna, assembled and ready for priming.

Close up of the forward end of USS Lackawanna's spar deck.

Aft end of USS Lackawanna. The rigging is minimal as would reflect a ship in combat.

USS Lackawanna after application of the primer coat. Should be able to get started on the paint job this week!


USS Kearsarge - ready for priming.


CSS McRae. This was a quick asssembly job. The most trying thing was getting the yards attached to the masts. I used JB Weld and a small clamp to affix the yards to the mast.


McRae after a coat of primer has covered most of the model.


More from Shapeways - mortar barges in (Not) 1/600

$
0
0
The mortar boat is a bit of an odd duck for tabletop gaming. They can't move on their own. The odds of actually hitting a moving ship are ridiculously low and the mortar boat has almost no capacity to absorb damage. Clearly, not the kind of unit that you will have much fun commanding on the game table. The mortar boat is simplicity itself - a raft 60 feet by 25 feet on which an open topped wooden casemate was constructed to house a massive 13 inch coastal mortar.

The classic example of the mortar boat

Artists remdering of the mortar boats
 
Still, you often find those times when reducing a fortification is the order of the day. And for those times, mortar boats are handy pieces. My collection has a handful of mortar boat models from Thoroughbred Figures. But you can also get them from Bay Area Yards or the new kid on the block - Shapeways. More specifically The web shop for Brown Water Navy Miniatures. 

I was ordering a couple of items from Shapeways, so I went ahead and tossed in a set of mortar boats for the heck of it. I can always use more mortar boats and, as I'd ordered some models from this shop before it was a good chance to assess another  of their1/600 product from Shapeways. Hussar123 on The Miniatures Page had positive things to say about their Eastport and Lexinton models, let's see what happens.

The models arrived without an excessive delay, but bear in mind I was in no rush and chose the cheapest (i.e. slowest) of shipping methods. But they arrived, safe and sound.


A digital render of the Brown Water Navy models

Judging

The models were printed using the Frosted Ultra Detail material, better known to Shapeways users as FUD. Now FUD is a fine material that does deliver the details at a fine level. The downside of FUD is it's cost, these three mortar boats cost me $10.00. Not a big chunk of change, but still we're talking real money here.

The items were well packed and arrived intact. Kudos to Shapeways for a job well done on shipping and handling. They've got that part of the work down. 


Close up of the mortar boat model.
As you can see, it's a crisp casting print that captures the expected details of a mortar boat.

Here's the problem...the model is not 1/600 scale. 

The accepted dimensions for the mortar boat are 60 by 25 feet. In 1/600 scale this works out to 1.2" (just under 1 1/4") by 0.5" (a half inch). If I pull out a Thoroughbred Figures model, the raft measures to almost exactly those dimensions. However the Brown Water Navy Miniatures model is substantially smaller - it measures 13/16ths of an inch by 7/16ths of an inch wide.  This is a bit smaller than the scale would support. It works out to be 67% of expected scale length and 87% of expected scale width. While it may seem I'm being picky, the difference between 1:100 and 1:144 scale models is 69%. Many of us are not going to mix models of such disparate scale on the table. 

But could you mix them together on the table? Well, let's give it a try. Here are a few pictures with the Brown Water Navy models mixed in with the Thoroughbred Models mortar boat. 


All three of the Brown Water Navy models around the Thoroughbred model.


And one on one right next to each other.

So, too small for 1/600 - how do they look with a 1/1200 scale model?

Appearance wise, the models just don't cut it for me as 1/600. I know this is to some degree an aesthetic choice, but they really are too small to be proper 1/600 scale models. The actual mortar is something of a stump in it's unpainted state. It's a shame too as the FUD model is otherwise rendered nicely with openings at the ends and sides of the bulwarks. If you are a 1/1200 gamer, you might consider these for your collection as I think they fit much better with the smaller scale.

The Verdict
At this time, these cannot be recommended as a go to solution for 1/600 mortar boat models. The undersized nature of the models coupled with the high cost of Frosted Ultra Detail is a fatal double whammy. Spending more for less is never a winning solution. As a consumer, this purchase leaves me very disappointed. 

2/14/2016 Update:  I traded e-mail with Brown Water Navy Miniatures regarding the scaling issue. They agree the mortar rafts are too small. They will look into it when they get some time. 

The reigning champion for mortar boats remains Thoroughbred Miniatures with four models for $8.00 with Bay Area Yards placing second with 3 for $9.00 (and you'll still save a buck too from the cost of tiny FUD models!).

Viewing all 109 articles
Browse latest View live